Finishes and Coatings Guide for Interior Designers
By Faura ·

A finishes and coatings guide is only useful if it produces a working document: a finish schedule with named system build-ups, gloss levels and a sample or mock-up request against every line. Set that up before tender and you cut the two most common causes of site delay: substitution disputes and colour or sheen mismatches discovered on site. The checklists below cover the performance criteria, system examples and procurement sequence to get there.
TL;DR:
- Creating a detailed finish schedule with system build-ups, gloss levels, and sample requests before tender prevents substitution disputes and color mismatches on site.
- System approaches like full build-ups for paints, plasters, and resins ensure predictable performance and help avoid aesthetic disputes during installation.
- Referencing specific performance criteria such as abrasion resistance, slip ratings, and VOC emissions in specifications helps secure finish durability and compliance with project needs.
- Sampling must include full-scale mock-ups and supplier datasheets to ensure color, sheen, and performance match expectations before contract signing.
- Using centralized showrooms and consolidated suppliers reduces procurement delays and simplifies comparisons, saving time and minimizing specification errors.
Table of Contents
- Finishes and coatings guide: the main categories and where they fit
- What performance criteria belong in a finish specification?
- Which system build-ups work for common interior finishes?
- How should designers manage procurement, sampling and quality control?
- The Faura view on specification and procurement risk
- Where to check the detail before you specify
- Sources
Finishes and coatings guide: the main categories and where they fit
Every project finish falls into a handful of families, and each one carries its own maintenance profile and failure risk. Matching the family to the room, rather than the look alone, is what separates a schedule that survives contract from one that gets rewritten mid-installation.
- Paints and coatings — the widest range of sheens and price points; best for walls, ceilings and joinery where colour flexibility matters more than surface texture.
- Decorative plasters (Venetian, polished, tadelakt-style) — feature walls, reception areas and bathrooms wanting depth and light response; skilled labour dependent, so lead times run longer.
- Microcement — floors, walls and wet zones needing a seamless, jointless surface; strong for bathrooms and kitchens but intolerant of poor substrate prep.
- Resinous flooring — high-traffic commercial or hospitality floors, boot rooms, utility spaces; excellent durability and cleanability, weaker on warmth underfoot without added detailing.
- Stains and lacquers — joinery, timber floors, bespoke furniture; durability depends heavily on the number of coats and the topcoat’s abrasion resistance.
- Metal effects and specialist coatings — accent panels, balustrades, hardware surrounds; often applied off-site under factory conditions for consistency.
Wet rooms generally favour microcement or tanked resinous systems over standard emulsion. High-traffic corridors and hallways reward a scrubbable, higher-sheen paint system over a flat matt that shows every mark. Feature walls are where decorative plaster earns its cost premium, provided the lighting plan and mock-up are agreed first.
What performance criteria belong in a finish specification?
A finish schedule that lists only colour and manufacturer name is not a specification, it is a wish list. Professional specification guidance recommends building each line around measurable performance criteria, not aesthetics alone.
- Abrasion and scrub resistance — critical for corridors, kitchens and rental or hospitality projects with high cleaning frequency.
- Cleanability and stain resistance — particularly for kitchens, healthcare-adjacent spaces and anywhere food or spills are routine.
- Slip resistance — essential for flooring in wet zones, entrance areas and accessible routes; specify a pendulum test value (PTV) suited to the use.
- Fire rating — required for escape routes, commercial ceilings and certain wall linings depending on building use.
- VOCs and emissions — increasingly requested by clients pursuing low-emission interiors or sustainability accreditation.
- Moisture tolerance — decisive for bathrooms, kitchens and basements where vapour transmission affects long-term adhesion.
Structure the schedule using the same three-part logic architects already use for every other trade: General (scope, standards referenced, submittal requirements), Products (manufacturer, system reference, gloss level), and Execution (substrate prep, application method, protection and cleaning). This three-part structure (familiar from MasterFormat in North America and NBS clauses in the UK) forces the same evidence trail for every finish, so nothing gets specified on a hunch.
Request the technical data sheet (TDS), safety data sheet (SDS) and any relevant test certificate before you commit a line to the schedule, not after. Manufacturers are generally required to supply factory-mixed coatings and performance data on request, and a supplier reluctant to provide test certificates for fire or emissions performance is telling you something about the product.
Pro Tip: Write the finish schedule note as an instruction to the contractor, not a description for yourself. “Provide two coats, factory-tinted, dry film thickness as stated on the manufacturer’s data sheet, no on-site thinning without written manufacturer approval” leaves no room for a site team to improvise.
Which system build-ups work for common interior finishes?
A single product name on a schedule tells the contractor almost nothing about how the surface will actually behave. System thinking, specifying the full build-up rather than one product, is what makes a finish predictable over its lifespan rather than a gamble.
Standard emulsion wall system:
- Substrate prep: fill, sand, spot-prime bare patches.
- Primer: one coat sealer/primer appropriate to substrate.
- Intermediate coat: one coat matched to topcoat system.
- Topcoat: one to two coats at specified sheen.
Gloss and sheen selection is not cosmetic. The MPI Architectural Painting Manual sets out numbered gloss levels from G1 (flat) to G7 (high gloss); UK specifiers can also cite the sheen classes in BS EN 13300, and specifying by a named MPI gloss definition rather than a supplier’s marketing term (satin, eggshell, soft sheen) avoids the mismatch that happens when two manufacturers use the same word for different reflectance values. That single substitution, sheen name for sheen grade, is one of the most common causes of a “wrong finish” complaint on handover.
Decorative plaster system: substrate prep and bonding coat, base plaster application, polishing or burnishing stages, and a protective wax or sealer. Full-scale mock-ups under the room’s actual lighting are the single most important quality-control step here; a small sample rarely predicts how a Venetian or tadelakt finish will read across a full wall.
Microcement and resinous floor systems: primer or moisture-mitigation membrane where required, base coat, reinforcing fibre or mesh layer if specified, microcement or resin topcoat, and a sealant matched to expected foot traffic. Waterproofing detail at floor-to-wall junctions needs its own note; it is the point where most wet-room failures originate.
For every system above, require applicator references and a signed mock-up approval before full application starts. It is a small step that closes off most aesthetic disputes before they reach a client walkthrough.
How should designers manage procurement, sampling and quality control?
Bespoke colours, artisan plaster finishes and custom-tinted systems all carry longer lead times than standard stock lines, and building that buffer into the programme early avoids the scramble that happens when a site team is ready for a finish that hasn’t been ordered yet.
- Request a physical sample board for every candidate finish, viewed under the room’s actual light source, not office fluorescents.
- For decorative or artisan finishes, insist on a full-scale mock-up panel, not a hand-sized sample, before sign-off.
- Check the sample against adjacent materials on the schedule (flooring, joinery, metalwork) rather than in isolation.
- Confirm trade account pricing and lead times before the finish goes into the tender pack.
- Build in an inspection stage at first-coat and final-coat to catch batch or sheen inconsistency before the next trade covers the wall.
Consolidated sampling platforms have changed how boards get assembled: a Material Bank-style service can deliver multiple manufacturers’ samples in a single shipment, cutting the back-and-forth of ordering from a dozen suppliers separately. A curated trade showroom offers the physical equivalent: seeing several finish systems side by side, under one roof, with someone on hand to talk through sourcing routes for finishes and materials.
Pro Tip: Order your mock-up panel the same week you issue the tender pack, not after. A four-week plaster lead time discovered at week two of a twelve-week programme is a manageable adjustment; discovered at week ten, it’s a missed deadline.
The Faura view on specification and procurement risk
Most specification delays trace back to the same root cause: a designer chasing five separate suppliers for five sample boards, with no single point of comparison. A trade showroom in London exists to remove that friction. Faura works with over 200 brands under one roof, including paint and natural stone and surfaces, so several finish families can be reviewed in the same appointment rather than across separate diary entries.
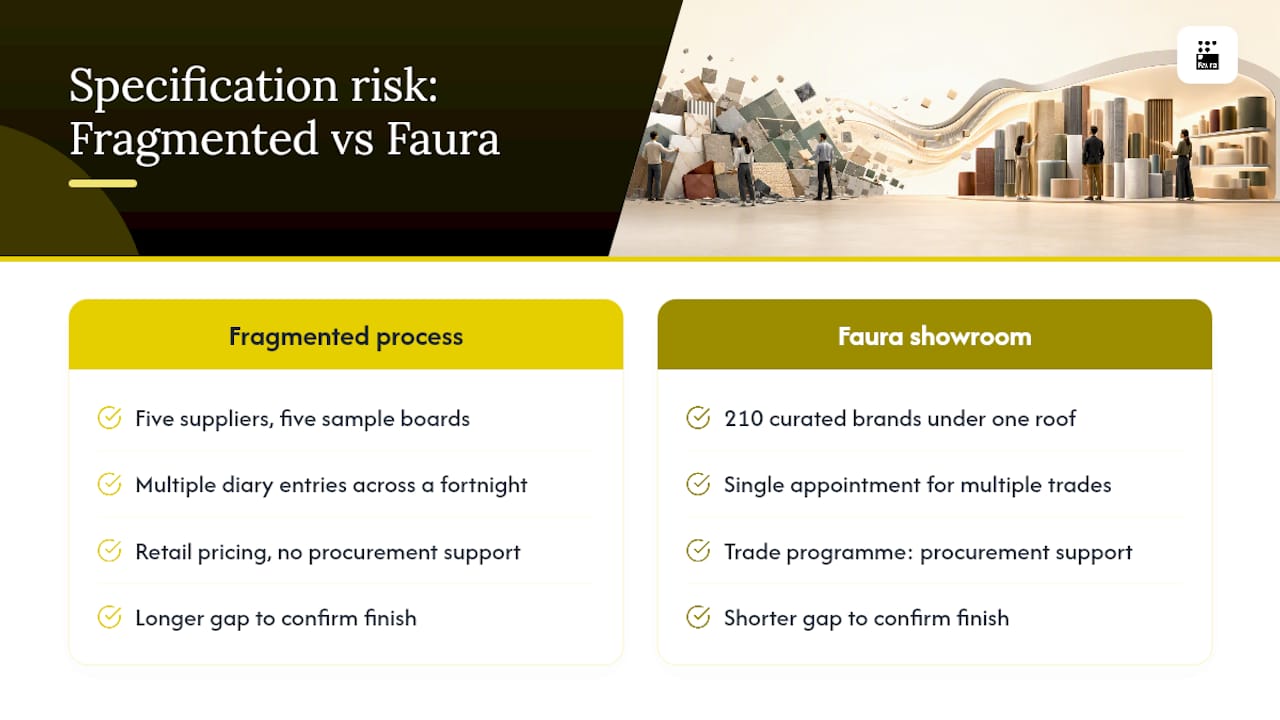
Trade terms matter here too. Designers working through Faura’s trade programme get procurement support and trade terms confirmed directly with each approved account, which can shorten the gap between “this finish looks right” and “this finish is confirmed on the schedule.” For larger specifications, spanning joinery lacquers, feature plaster and flooring in a single project, that consolidation is where most of the time saving actually happens: fewer supplier calls, fewer separate sample deliveries, one showroom visit instead of many.
If a project’s finish list is getting long enough to feel unmanageable, booking a showroom appointment early in the specification phase can be worthwhile.
— Faura Editorial
Where to check the detail before you specify
For gloss definitions, the MPI Architectural Painting Manual is a useful North American reference; on UK projects, BS EN 13300 sheen classes are the more familiar basis for a schedule. For paint system tables, primer pairings and high-performance coating notes, ARCAT’s specification pages give ready-made clauses. For the underlying three-part specification structure and sample-board workflow, the IDI material specification guide and this practical wall finishes guide both set out the reasoning in full.
Sources
- Interior, Exterior and High Performance Paints and Coatings — ARCAT Spec
- MPI architectural painting manual — guide specification (April 2022)
- Architectural wall finishes: a practical specification guide